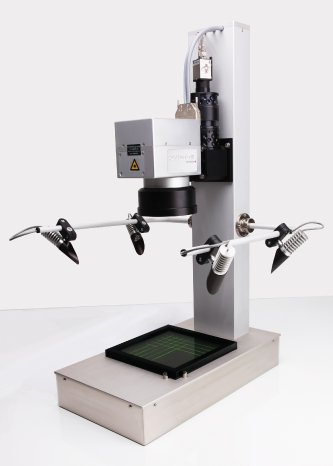
Quality control is crucial for laser applications requiring very strict dimensional tolerances and exact positioning of workpieces – possibly even across several days or multiple batches. One ideal approach to this challenge is integrating a camera-based calibration solution into the system that directly performs image field correction and detection of workpiece orientations.
With the SCANalign image processing solution, a camera captures images coaxially via a camera adapter or side-mounted standard objective. Intelligent algorithms then transfer acquired image data as laser coordinates to enable direct correction of laser scan processes.
System operation is via a clearly structured graphical user interface (GUI) that requires no programming expertise. Integration into production equipment is facilitated by a provided managed-code library or TCP/IP. The image processing software delivers calculation results usable by laser processing programs such laserDESK to align scan patterns to the workpiece's actual position and orientation. Upon detection of errors, the process operation can be immediately aborted. This eliminates the need for exact, time-consuming positioning of workpieces within the scan head's processing field, while still ensuring best process results.
More exact than the laser spot itself
SCANalign uses a high-precision calibration plate to achieve absolute calibration of laser coordinates for dimensionally accurate laser processing, with obtainable precisions that can be smaller than the process laser's spot size. For applications with a 255 mm focal length and 1064 nm laser wavelength, absolute precisions under 10 µm can typically be achieved. Applications particularly benefitting from this smart image processing solution include micro-welding, via-hole drilling, micro-structuring and de-coating.


